 (original version 10-29-2013)
(original version 10-29-2013)
Clay Cowgill, October 29th, 2013
The idea for the control panel and control panel overlay evolved over time. I started off wanting to do a sculpted/3D type control panel with hints of "From Beyond". I had worked with 2-part urethane foams a bit before and I liked the idea of having a squishy and weird surface for the game.
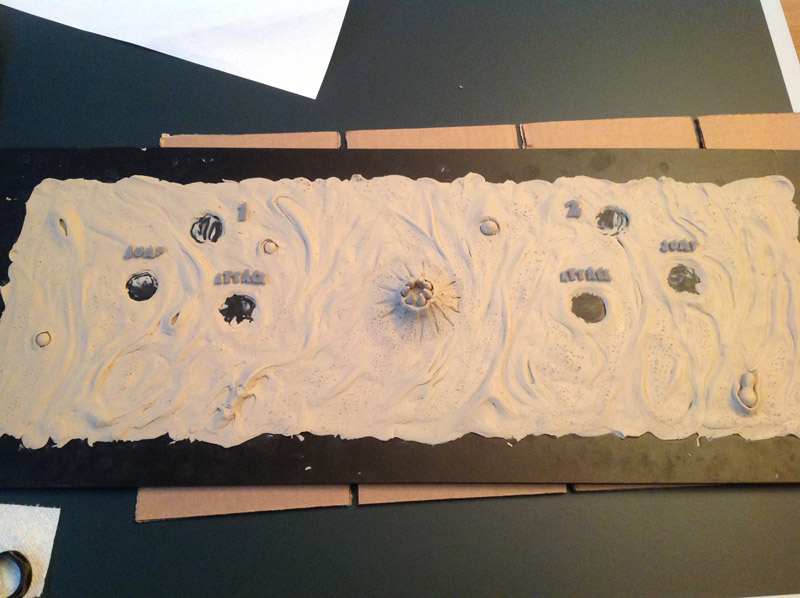
I started out by sculpting (I use that term lightly-- I'm no sculptor!) a form that would accommodate the joystick and button holes already present in the control panel-- no sense in making that any harder than it needed to be.
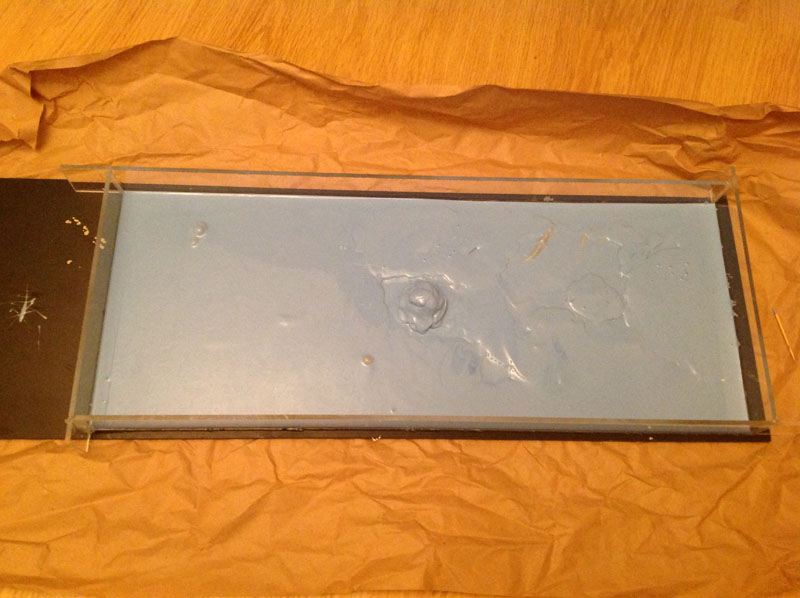
I applied silicone mold making material over the sculpture in order to make a negative mold that could then be used to case the urethane foam. Silicone is somewhat expensive for this task (I think the mold ran almost ~$70), but it's easy to work with and since it is inherently a non-stick surface the urethane can go in without any need for a release agent (like various slick oily sprays) which meant that I wouldn't have to clean the oil *off* the foam rubber before I could paint it. That's worth the extra expense to me.
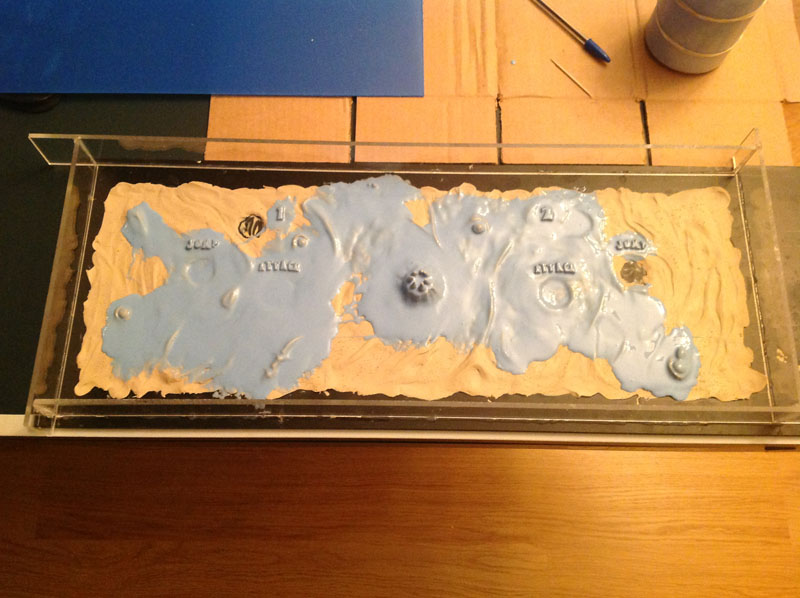
Here the silicone is nearing the final stage-- I start adding 'keys' in the form of odd-shaped blobs on the top to give the silicone something hold on to when it's backed up with plaster for the casting process.
I used Smooth-On urethane foam and tinted it with a mixture of their So-Strong red and brown tints so that if any paint comes off, there wouldn't be a bright white spot showing through. This is the resulting foam casting when it's pulled from the mold. It has about the consistency of a Nerf football.
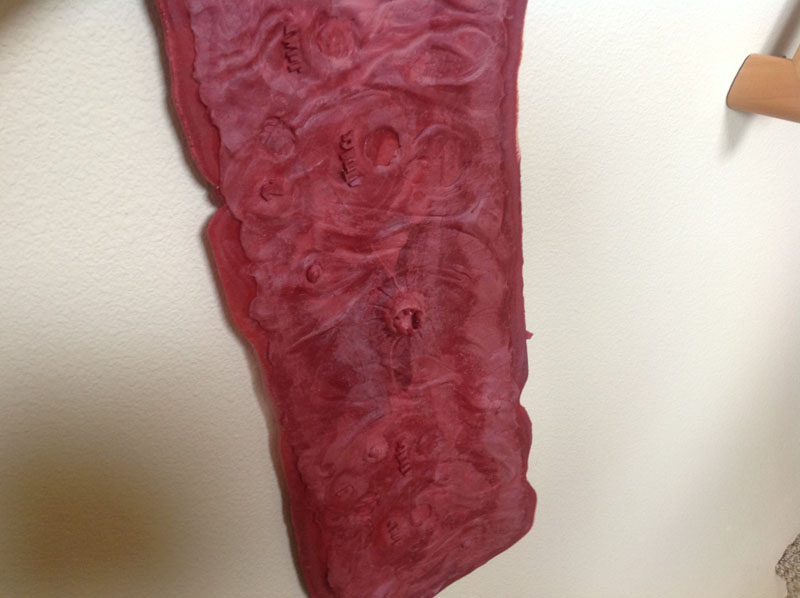
The foam forms a skin when it's cast with a slight bit of pressure (I covered the back as it was casting with a sheet of acrylic). You can see that it holds detail quite well.

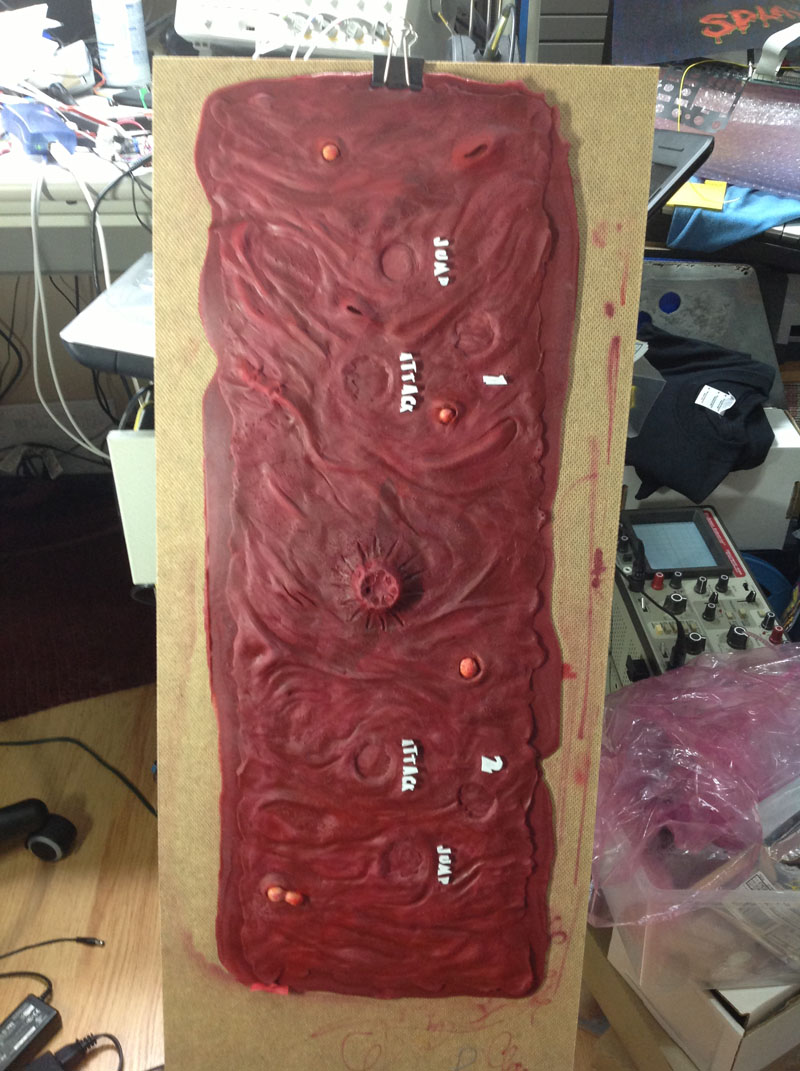
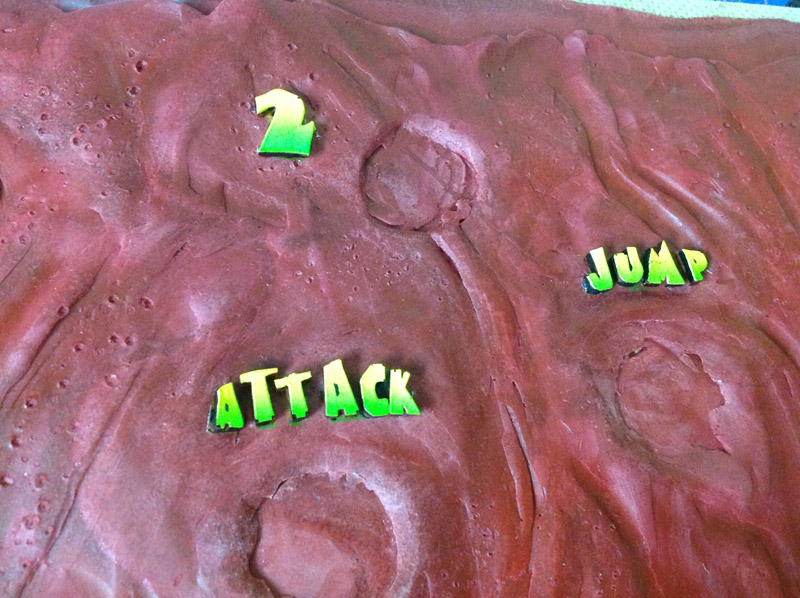
Next up was paint. Again, the airbrush was used to put down multiple layers of different reddish browns as well as some oranges and beige for the little 'pustules' here and there. The lettering was painted white with a small brush.
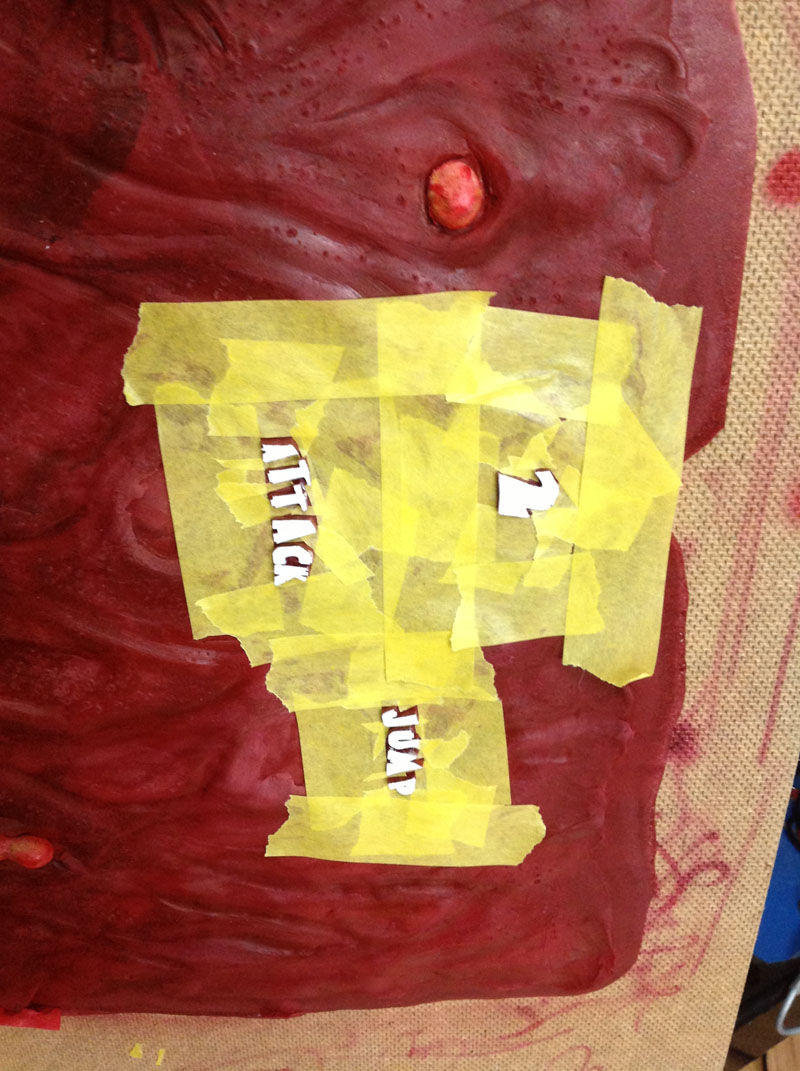
I wanted to airbrush a nice gradient of yellow and green for the button labels (shameless stole that idea from the colors used on Zombies Ate My Neighbors) to give them a nice contrast against the red, so there was a fair amount of masking tape applied to prevent any over-spray.
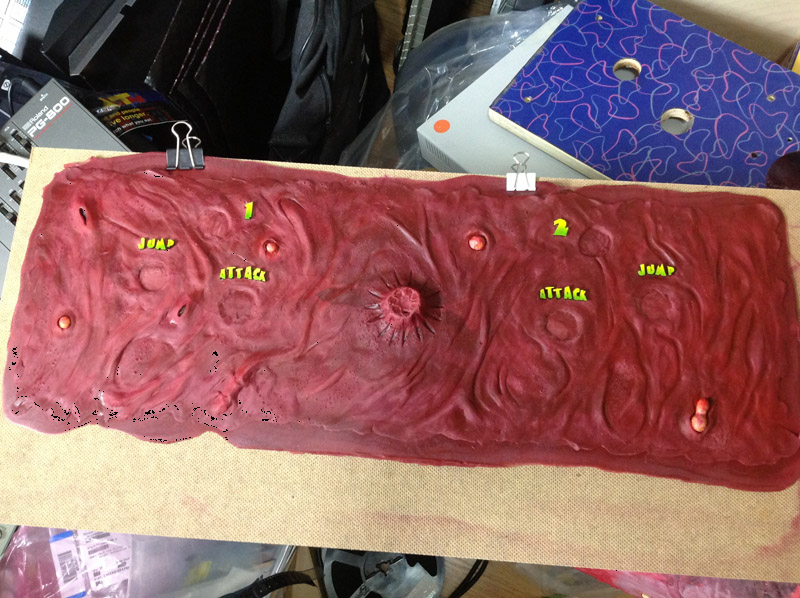
Here's a picture with the button labels painted-- I went around all the letters and trapped them with black to make it stand out a bit more and add features (like the inside 'hole' in the 'A's that were obscured by painting over with the white. You can see the blue/purple control panel from the game in the background of this shot.
...and a close up of the gradient and black outline.
For the final product I applied a coat of "Ever Wet" which is a glossy top coat that is also flexible. Hopefully it will protect the paint a bit and not flake off as the control panel flexes. It will be interesting to see how it holds up since sweaty hands and beer in the arcade might not be too compatible...
