 (original version 10-29-2013)
(original version 10-29-2013)
Clay Cowgill, October 29th, 2013
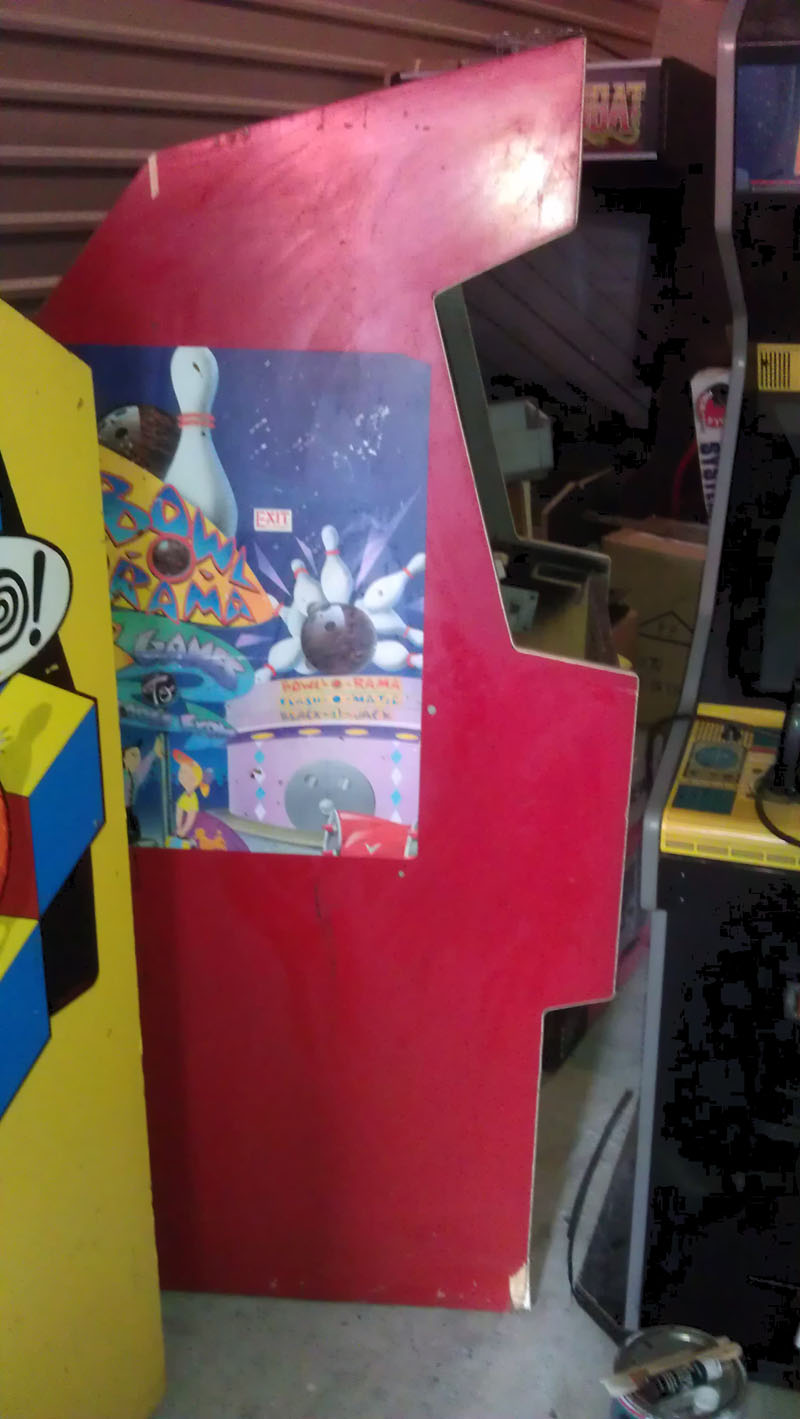
The cabinet started life many, many years ago as a Williams Defender. Sadly, over the years it had been converted multiple times to other games and left in poor storage conditions, so it was in very rough shape. Aside from the fact that it was painted no less than five different colors (red sides, yellow, purple, black and orange front, plus a blue/purple control panel) the cabinet had picked up serious water damage over the years as well as having the control panel seriously hacked up, coin door hasps added, a ticket dispenser added, the original monitor shelf removed and a vertical monitor crammed inside, the original power supply and all wiring removed-- plus a missing rear door.
It would have been *extremely* hard to restore to a decent looking Defender, so it sat for years taking up space... Until this year.
I stabilized the water 'poof' on the melamine parts by painting in epoxy resin and made a new coin door and added some supports for a horizontal monitor. The non-functional fluorescent light was removed and I patched up the wiring enough to get a game working. The monitor was also broken, so I swapped the chassis board out with a spare and had a working, albeit horrendous looking, cabinet.
This is a view from the side-- I should have taken one from the front. It was way worse.
I started applying 'monster mud' to the cabinet. A combination of 'Drylok' paint, drywall joint compound, sand, and acrylic paint for pigment. I just put it on top of everything as-is. It took about three coats. I also 'cut' in some cracks in the monster mud with a fingernail-- this gives a little channel for water to run down and carry paint for more realistic looking 'cracks' in the 'stone'.
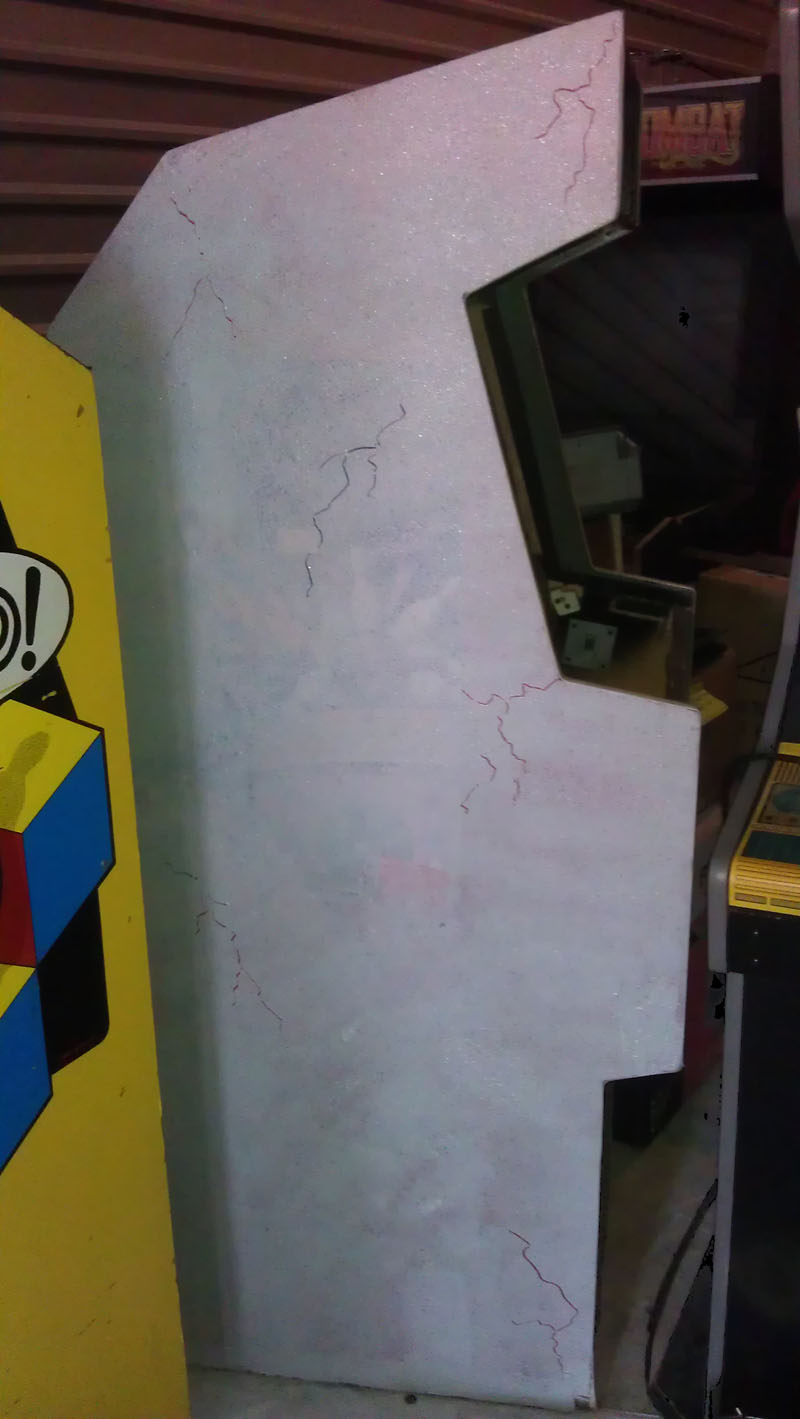
Painting at this stage consists of just applying washes of dilute black paint all over the cabinet and letting gravity and capillary action make interesting waves of texture on the surface. I trace the cracks with black paint and then wash over them again and again to mimic erosion. Later on, I go over this with an airbrush to add more detail and streaking and further eroded surfaces.
